Showing posts with label diy on a dime. Show all posts

Saturday, January 31, 2015

DIY :: kids leg warmers

I love leg warmers. And when I wanted plain ones (just grey or black. simple. casual. comfy.) for my newborn baby I couldn't find them. I knew they would be easy to sew out of fabric if I found the right kind, but I wanted to make it even easier for myself...because I have a newborn baby of course. Off to target I went and picked up some ladies knee high socks. A whole $2.50 per pair. For my one month old baby I cut the foot off and then cut up the back of the "tube" and in about 20 seconds sewed a skinnier/tinier pair for my babe.

BUT- if you don't have a newborn it gets even easier. Just cut off the foot. Done. Yep that's it. And how cute are these heart ones with valentine's day right around the corner. I just bought them on Friday too so you should still be able to snag some :) For $10 bucks you've got yourself 4 pairs. What are you waiting for....go make some!


They are perfect for dance too :)

These are the ones I cut open and sewed up the back to make them tiny...

Saturday, November 29, 2014

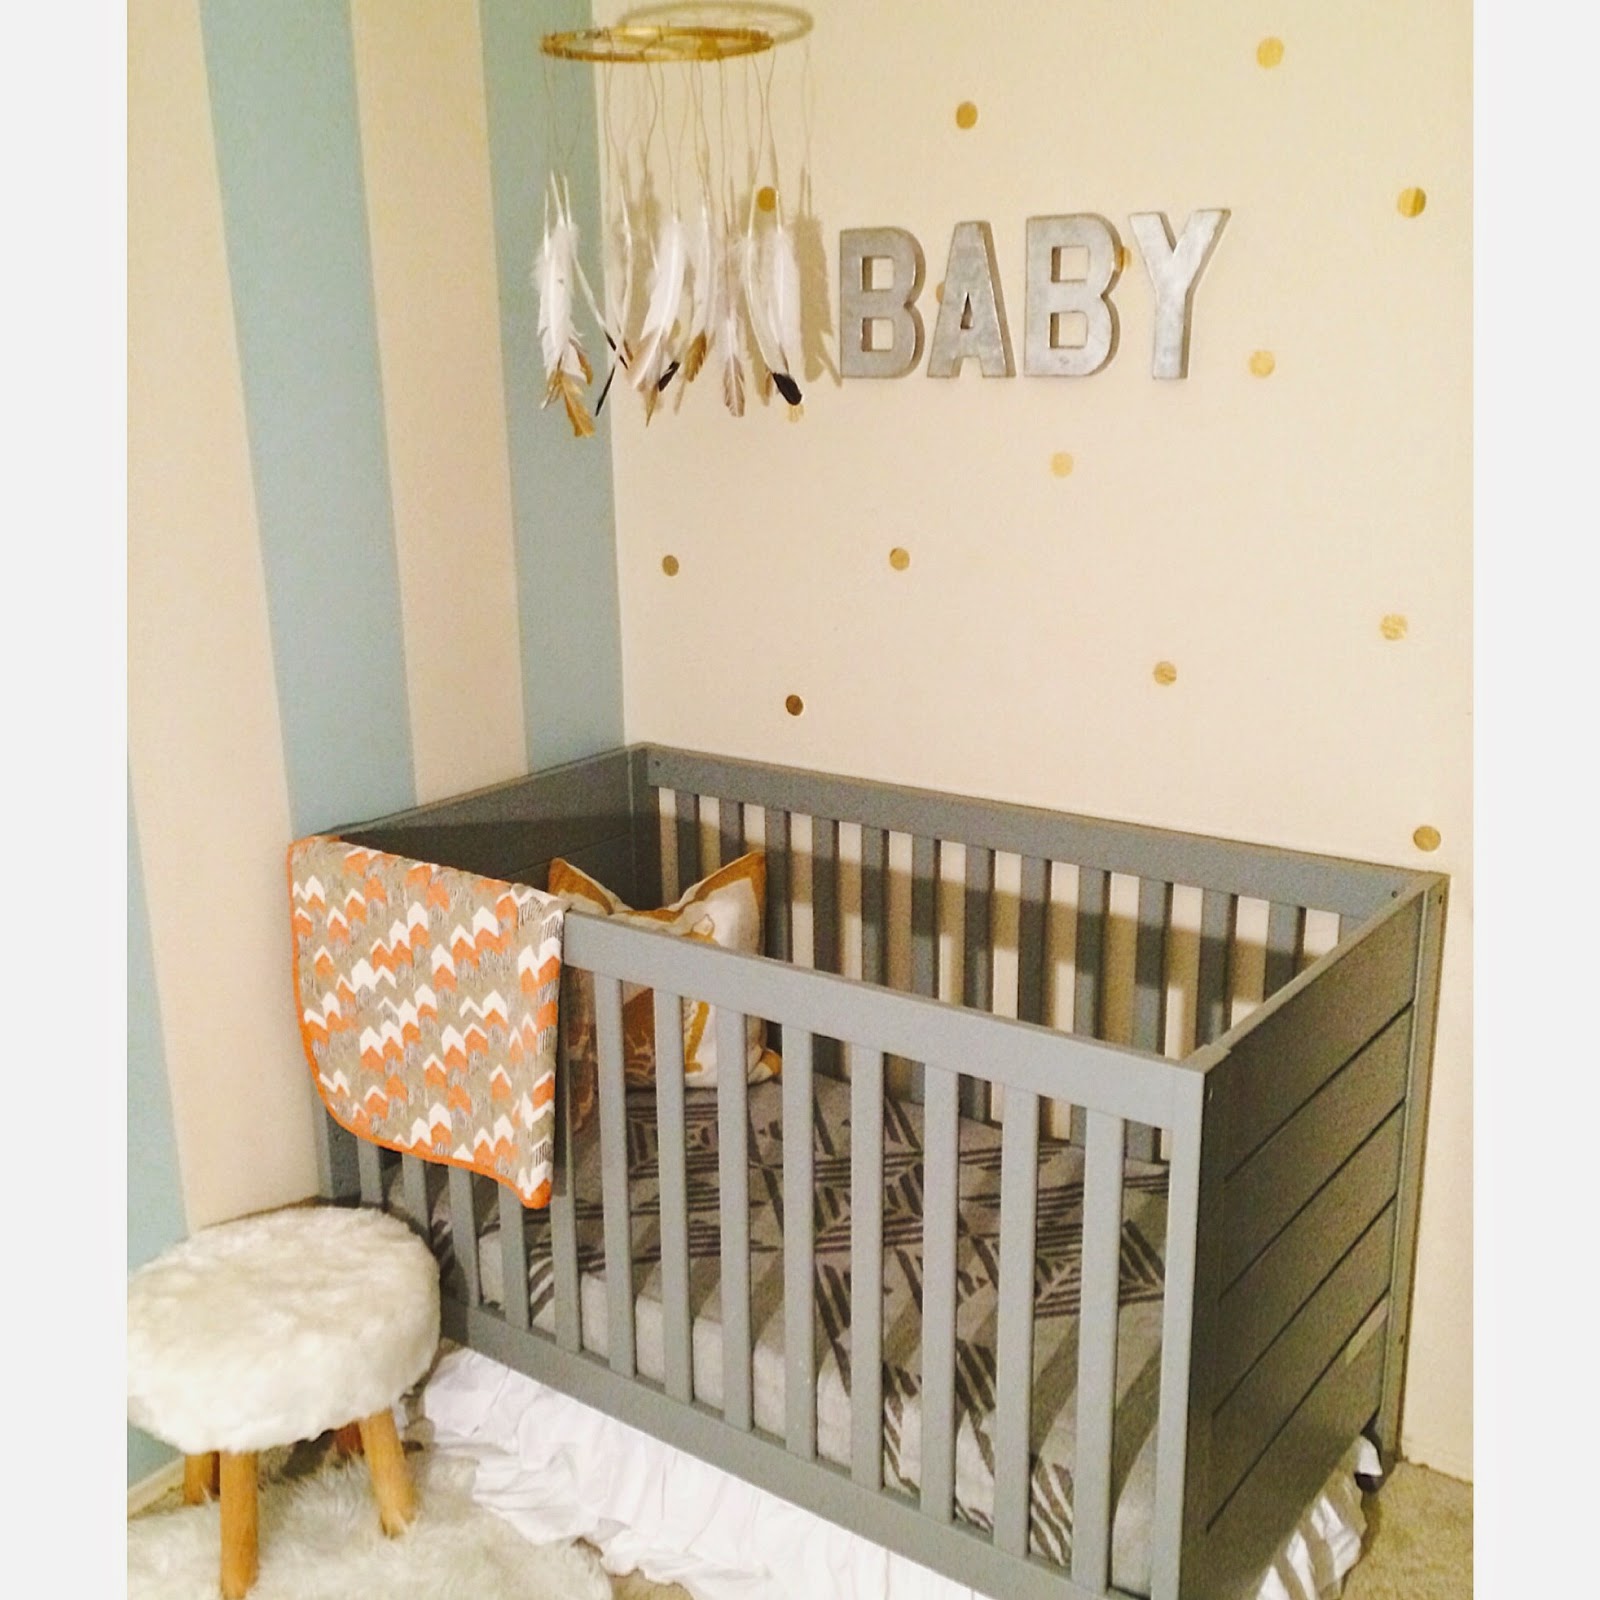
diy :: dream catcher mobile

I have been wanting to hang something new and different above baby's crib for a while now but wasn't sure what. For Everly, I made a few tissue balls (which are simple and make a cute statement) but felt I wanted to change things up for baby #3. Since we don't know if peanut is a boy or girl it had to be somewhat gender neutral.  This past weekend I was at a craft fair and saw a gorgeous dream catcher and couldn't stop thinking about it. Unfortunately it was a bit too pricey for my tight nursery budget so I decided to make my own {simplified} version and in a mobile. This project took me about an hour and cost just under $15.

The materials:
- sponge brush or paint brush
- embroidery hoop (I used a 12" one) $2.99 at michaels regular price (40% off with coupon :)
- gold paint (69¢ at michaels)
- fake feathers
- gold ribbon/string
- fishing line
- clear tape

STEPS:

1. Paint the tips of your feathers gold. I used 13 feathers. 4 already had black tips when I bought them so I left them like that.

2.Paint your embroidery hoop gold. Let dry.
3.Tie your gold string from one end of the hoop to the other. Repeat until you get the desired look.


4. Cut and tie your string to the hoop. The length can be whatever you want.
5. Tape the tips of your feathers to the end of each hanging string
5. Take your fishing line, tie it to the hoop and then connect it in the middle to hang from your ceiling.

You are done!


Friday, May 16, 2014

diy friday:: pom pom flowers

For the birthday coming up I wanted to have some simple decor around the beverage and food table, to add a little color and fill in the empty spaces. My first thought was flowers. Although I love flowers and they are absolutely gorgeous the heat here has just been way too hot and I would love something I could repurpose again. So... pom pom flowers it is! What's great about these is they can be used on my mantle after the party too, or for that matter anything really.

These are super easy (& inexpensive) and the best part is you can make them while watching your fav tv show! Before you know it you will have made ten :) Since I already had most of the supplies this project cost me under $5....wohoo!

What you will need:
YARN- I used some left overs I had and then got a cheap spool from michaels for $2.99. Wal-mart also has yarn.
TWIGS- I just got some from my backyard
VASES/JARS- random sizes are best
POM POM MAKER- This is not a must, but I do recommend it.. I already had one but you can get this at wal-mart for $5 or michaels for $8. The brand I have is clover and comes in a pack with 2 different size makers.

The easy how to:
-I think its best to google a how to video and watch a tutorial on how to use your pom pom maker first
-Next make your pom pom and then simply just stick your twig through the yarn. No glue needed.
-Place it in a vase and you my friend are done!


Saturday, May 10, 2014

chalk talk :: diy on a dime

My son just turned 3 on Wednesday May 7th and next weekend we will be celebrating with a joint ice cream social party with his girlfriend Raelyn, born a week after him. He is an ice cream lover (like his mama), so this theme was perfect. Over the next week I will be posting some small diy projects that myself or my friend Diane have been working on.  And don't worry all will be quite cost effective, hence the subtitle -diy on a dime :)

We wanted a sign for the photo backdrop and loved the saying "I scream you scream we all scream for ice cream." Especially because we know a few kids may be screaming haha. Since I'm not great with free hand chalkboard lettering and because we don't want the kids to mess up the chalk when they hold the sign, I decided to work a little smarter and not harder. So yes- I just jumped on the computer and made it. Then for only $5.99 I printed it out as a 16x20 at costco and will frame it next. Here it is!


I also wanted to make a small one for the ice cream station and printed the below design in an 8x10 at home.


How to make any similar sign:
First you want to grab your background image. There are tons of free chalkboard backgrounds you can use. I found one from here.

Next is the fun part. You get to pick your fonts and then dream up any saying you want. If you don't have a lot downloaded you can get free ones at dafont.com. Here are the names of the ones I used written out so you can see what they look like. Super easy right?! If anyone would like the sign I made as a 16x20 for personal use just email me or you can use the files above to print an 8x10, Enjoy!